Wolfman
DeepGroover-(T)
June 25, 2012 begun
Caves
> DeepGroover's
Entry Hall > previous
> Wolfman >
next
Click
to enlarge. Scroll down for more.
Here's the finished life-sized model, with how DeepGroover did it below.
Completed:
Work in progress:
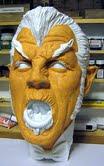
June 25, 2012
All right
y'all....I've officially started the werewolf. Today I spent some time
sanding a few spots along the back where he goes flat, and washed him in
the kitchen sink. He dried for several hours, and I just finished
putting the first base coat of flesh on him a little while ago. Despite
the hue in the photo I can say it appears more realistic in person. I'm
taking a big risk sharing the progress with you. If I don't like how its
going it'll be too late to keep it a secret. Everyone cross fingers.
I'll be on this one for a while....
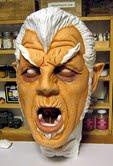
June 30, 2012 (two angles)
Well,
everyone, here's the current status of Wolfie. Sorry about the tint of
the photo. Trust me...his flesh tone is much more realistic than my
photos are implying. I've added shadows and highlights, and the dark
areas under his eyes.
I also did some basic eye area lining, and have
begun on the mouth. Thankfully the resin was the sort to allow a bit of
soaking in. This most definitely works to my favor, as I can do a
slightly better job blending colors.
I used basic flesh with white for
the highlights, and for the shadows (after studying my own color) I
mixed flesh, rust, and a hint of red. I also used this color to feather
the edges of his head near the hair.
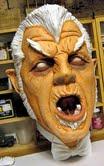
The bags under his eyes were done
with a mix of dark grey, red, and a bit of flesh.
The linings of his
eyes consist of red and rust together.
For his mouth, I used a mix of
red, rust, and a bit of white for lighter areas. Later, for a darker
tone in some spots I used the red-rust combo but with a hint of black.
Next step will
be to further detail the mouth, including shading and "veining" his
tongue, painting his back teeth, and further defining his lower lip.
I'll paint the lower gum/teeth insert prior to installing it. I'll also
dark out his nostrils.
Doing his eyes will be a mini project in
itself. I've read several articles on how to get a realistic look, and
I'll use those along with my own methods. I'll be anxious for that part
to be done, and hopefully just as excited to share the results with you.
I plan to have him gazing to the side.
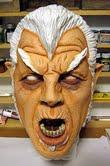
July 1, 2012 (two angles)
Well, I was
very busy yesterday, and basically got Wolfie's mouth done.
I created
what I think was a wonderful shade for the teeth. It came from
experimenting, but consisted of a mix of white, yellow, light grey, and
finally dark brown oil for a subtle shading. I painted his entire inner
mouth, then the lower partial. The partial was test-fitted to make sure
no unpainted areas were visible. The last steps were to generously coat
the inner mouth with clear acrylic gloss, and then the partial. When the
partial was dry to the touch I glued it into place.
If you look closely
at the eyes in both photos you'll see a pencil outline for his irises. I
cut circles out of napkins for templates. I chose napkin over ordinary
paper because the napkin is softer, and therefore more likely to contour
where needed. I held the cutout in place and traced the outline with
pencil. This will help ensure a proper circular shape, even though it
disappears into the eyelids.

Based on information provided from the
owner of the company, I will be painting the eyes green, and the hair a
darkish brown. I'll feather a bit of grey into the hair around his face.
Also,
according to my source, both the shirt and bow tie are white. I'll
probably paint the tie off-white just for a little contrast.
It seems
I won't need all of July for this after all. In fact, despite taking my
time to get it exactly like I want it I'll probably be done by
mid-month...at the latest. Once he's done I'll look for a suitable
shadow box or frame to display him.
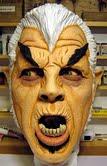
July 4, 2012 (three angles)
I was very
busy the last few nights, as you can see. I spent one whole evening
session on the eyes. There's a really good "how to" article on the Black
Heart website about this, so I read it and adapted the necessary parts
to my painting style. Once I was satisfied with the color applications
of the iris and orb, I sealed it with that Devcon epoxy.
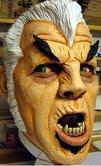
Last night I
spent my time painting the base color for his "soul patch", eyebrows,
and his eyelashes. At first I planned to use dark brown as the base, but
considering I lighten from my base color it seemed too light for my
taste. I chose black instead, and when dry-brushing brown over this I
should get the shade I was wanting. I'll also heed some expert advice
and add a hint of grey to the temples and such.

At the pace I'm going
I'll probably have him completed by the end of this coming weekend. If
not surely by the next one. I must say its a kick to stare at this thing
on my worktable, and have it look back at me.
I plan to add the
highlights to the parts of his hair I painted. I'll also add some
shading to his ears before starting on his main hair.
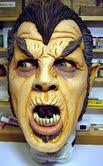
July 7, 2012
Well ladies
and gentlemen, I put the final touches on Wolfie this morning.
I spent
Thursday night giving his hair a black base coat. Friday night was spent
giving the hair brown highlights and a bit of grey near the temples and
slightly lower.
I also painted his bow tie and shadows on his shirt. I
opted to leave his shirt unpainted since the white resin was a suitable
look.
This morning I refined the grey, added a lighter brown highlight
to the top of his hair, and shaded his bow tie. After one more close
scrutiny I declared him done.
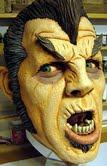
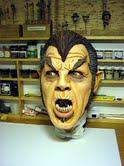
These first two photos are in my work
area, and done very basic with my little Canon camera. The third one is
for those not so familiar with models to see how big this guy is. If you
look carefully you'll see a soldier head in the background at top
right. That head is 200mm in scale. Of course being able to say this
thing is life sized makes size reference much easier. :-)
Today my
father will take some good photos, including one I hope you'll find
amusing. I plan to pose next to it, so not only will you see the true
size but some of you haven't seen me in a long time. I can only say I
hope to be more handsome than Wolfie. :-)
Also, I'm going to make a
formal display for him, which will include mounting him to a frame. My
plan is to purchase an 11 x 14 (ideal for him) frame in a style suitable
to his character. I have a trophy shop that makes all my name plates,
and they agreed to cut me a blank metal plate in 11 x 14, to replace the
glass. I'll then glue a bunch of flat magnets to the back of Wolfie's
head, and stick him to the plate. The final touch will be a custom name
plate at the bottom just below his bow tie. I'll hang him in my room
with immense pride.
I'm flattered to say I've been asked to share my
creation with the website that makes the product. I can certainly be
added to the many thrilled customers who came before me, and while I
can't exactly say my home will be filled with life-sized pieces, I'm no
longer afraid to tackle such a project.

July 8, 2012
Dad and I set up the
lights and background to do it proper. Photo one and two are over-all
shots.
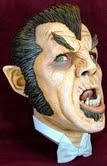
My last work on him was to add shading to his tie, and a hint of
highlight to his hair near the top of his head. The grey accents near
his temples really turned out good. The fade is smooth like I'd hoped
for.

Photo three is one more close-up of his eyes. I really enjoyed
doing this part. This was just the type of challenge I found exciting
rather than scary.
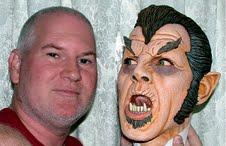
And yes....photo four is yours truly holding the
finished piece, mostly for size comparison. I look like a tomato with a
face in that photo, and don't know why. Now you can see why I don't like
being in photos.
And that brings to conclusion my first ever life
sized piece. Looking back I spent more time being eager than
apprehensive. Saturday I purchased a neat 11 x 14 frame, and Monday I'll
order the metal plate in that size. He's gonna look like a really cool
3D painting in a frame when I'm done.
PS: I'm the one on the left in the photo, in case there's confusion. :-)
July 14, 2012
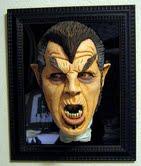
Well, here he
is, now properly displayed as I intended.
It started with approximating the frame size, which
thankfully was about 11x14. I picked out a suitable one at Michaels last
weekend.
Now came the challenge of how to mount him to it. Magnets
wouldn't work...a ton of them still wouldn't hold his weight. Same
with velcro. Finally I got the idea to screw him to a metal plate.
Fortunately the folks at Monarch Trophy (where I get all my name plates)
were able to provide me with an 11x14 steel plate, and more
importantly, tap holes where I wanted them. 1/8th inch holes were tapped
in the plate in a diamond pattern, based on an outline drawing of the
head provided by me. A whole week passed until I could collect the
remaining items I needed. It was torture. I wanted him up already.
Today
I went to Lowes and purchased some small wood screws (#4x1/2in.) to
attach the head to the plate. I also bought some self-tapping wall
anchors for putting him up on the wall. Now, armed with everything I
needed, I finally went to work getting him mounted. Not the easiest
chore, but I got it done. I tapped small holes in the head where the
screws would go, to help them along. I soon found out I needed to bore
the holes out a bit. That did the trick. They took with minimal effort. I
placed the plate with head attached into the frame, then put the glass
piece (for added thickness and reinforcement) behind it. (Note: my
sister [Elwing-V] gave me some flat 5x7 magnets, 2 of which I used in the center of
the glass to reinforce the middle of the metal plate and prevent
bowing). Finally, I attached the frame back and secured it. Now Wolfie
is elegantly displayable.
The last steps were to tap the place for
him on the wall (easy enough), and rig the wire on the frame for
hanging. I took no chances...I ran the wire about 5 times through the
eyelets, making it about 5 times stronger. Last, I hung him up.
I
realize most folks won't go to as much trouble, but I thought it is such
a cool piece it deserves a fancy display. I like to think of it as a 3D
photo. I like the glossy black of the metal giving the impression of
him "floating" on the frame. Next week I'll have a small name plate made
to provide the actors name, character, and year of the movie.
I've
certainly learned a lot during the whole process, and you can bet when I
do my next one (and there WILL be a next one!) I now know what to do
for displaying it.
Note: DeepGroover-(T)'s how-to was later picked up for the gaming site: Black Heart Enterprises. Here is the link to their pdf version from their Tips section.
top


