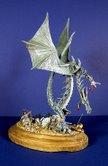
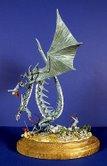
Dragon Fight
DeepGroover-(T)
January 1, 2009
Caves
> DeepGroover's
Entry Hall > previous
> Dragon > next
Click
to enlarge.
The artist's discussion of acquiring and building the dragon figure is below the photos.
Dec. 25, 2008:
A friend/co-worker heard me say several months ago that I'd not had
much experience at doing fantasy figures. He surprised me by giving me
a dragon. I thought he wanted me to build it for him, but he told me it
was a gift. Needless to say I was stunned. The dragon is by a war game
brand named RAFM. Have you heard of them? The box claims the scale to
be 25mm, which corresponds to 1/72 scale. Upon first inspection it
looked....well....rough. I must confess the quality seemed lacking,
with very poor fit and large gaps needing to be filled. I wasn't sure
I'd ever build it, but I felt obligated.
Fast forward to present day. The dragon is done, and turned out pretty
good. I chose to deviate from the red color of the box art for a more
traditional green color. Besides, I wanted his open mouth to really
stand out against his body, and being all red would've been less
effective. It came in 8 pieces, and sure enough required heavy doses of
putty to fill seams. However, thank goodness for my previous
experience! I not only filled them well, but even enhanced his cheeks
to look more realistic. His wings are so big I had to install a pin
through his body, piercing both wings, to anchor them securely. It
worked, and I hid the holes with putty.
The dragon was molded perched on a rocky surface, so I glued this to a
piece of craft wood, and extended the edges with Sculptamold brand
plaster. I added some small rocks to blend with the metal base, and
painted everything when dry. Finally I added some scenic grass and
little shrubs for effect. Now for the kicker....
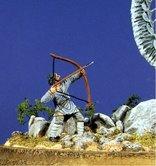
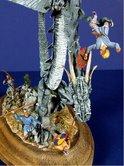
I chose 4 figures in 1/72 scale (technically Saxon warriors) to do
battle with the dragon. One will be laying on his back, defending
against the dragons bite. A second stands beside him with spear poised
to thrust. A third will be in one claw of the dragon (effective AND
humorous), and a fourth will be shooting arrows from behind.
I intend to take this piece to Lake Charles in late January to compete
in the war game category of the contest. Once done I will thank my
friend for his generosity by giving him the finished piece. There will
be ample photos before then, so keep a watch.
I'm proud of how the dragon turned out, considering the sub-par quality
of casting and fit. In the future I'll stick to items by Games
Workshop....of whom I have several pieces already in mind. I enjoy the
fantasy figure stuff.
Nice break from the historical.
Jan. 1, 2009:
Dad and I just finished taking a series of photos for my latest
project. The centerpiece is the dragon, given to me by a co-worker
because I told him I didn't have much experience with fantasy figures.
At first I thought he wanted me to build it for him, but then he told
me it was a gift. This was a company I'd never heard of before, and
upon inspection of the parts I knew a challenge was coming.
For one thing, even though its metal, it wasn't like the metal I'd
worked with so far. I don't mean it was better or worse...just
different. The first real red flag was fit. There were poorly
engineered joints, and I knew a lot of filling in would be required.
Also, parts just didn't mate up very well, and I procrastinated over
this for a few months. My friend would ask me once in a while if I'd
built it, and I always had some excuse.
Finally, during my extended holiday break, I decided to do it. My
predictions were correct...the initial fit and filling were the worst
parts. Once I passed that hurdle, it went smoothly and became fun.
Those of you interested in build details will want to read this next section.
The dragon as mentioned above was the greatest task. It consisted of 8
pieces. Because of the shape, both as individual pieces and overall, I
knew some reinforcement would be required. Turns out just a generous
amount of superglue was enough for most joints, but the wings/arms are
large and delicately positioned, so reinforcement was needed. I drilled
a hole right through the body where the wings attached. I then drilled
each arm, so the hole went all the way through. After checking for
alignment, I snipped a thick paper clip, and ran it through the entire
assembled area, again using superglue liberally. Once the whole dragon
was assembled, I could apply the putty to large gaps, and tidy up small
ones.
The only place I used putty other than to fill gaps was where the
dragon's cheeks are. It didn't look good the way it was sculpted, so I
enhanced that area with some putty. I'm sorry to say the effort is hard
to see in the photos, but mostly because it was a subtle change.
The dragon is sculpted perched on a rocky base. I glued this to a piece
of craft wood, and allowed it to dry a few days. Then, before any
painting, I used a plaster-like product named Sculptamold to enhance
the metal base and fill out the surface of the craft wood. I added
small rocks to blend with the base. The next step was to paint the
base, and stain the wood. I topped it all off with a mix of scenic
grass and little shrubs.
Painting the dragon was an exercise in creativity, in more ways than
one. I had already fixed it to the wooden base, so I had to hold the
entire piece in my hand....suspended at weird angles sometimes....to
paint it.
Thank goodness I have strong wrists. :-)
The box art called for the dragon to be red, but I didn't like that
choice. I wanted mine to be more traditional, so I opted for a shade of
green. In fact, I used a green/gray color usually reserved for WW2
German uniforms. It was a good choice, and allowed a lot of variation
in shadows and highlights. I offset his belly with an off-white shade,
and painted his nails and horns in a mix of beige and white, with brown
oil paint shading. The mouth was fun, and I tried to make it look real
by applying a coat of high gloss to simulate wetness.
Once the dragon was done to my satisfaction, it was time to add his opposition/prey.
I used figures by a company named Emhar, and they are technically Saxon
Warriors. Their scale is 1/72, which corresponds to the 25mm scale of
the dragon. (These two scales are considered the same in many circles.)
What's particularly neat about these little figures is the plastic
they're made of. It can be bent to shape, even down to the littlest
thing. This was important, as I reposed every one of them for my needs.
The fallen figure was originally running. I cut the base and reposed
him to be lying on his back. I drilled a tiny inconspicuous hole in his
back and mounted him on a toothpick for painting. I gave him the same
treatment I reserve for larger figures, right down to the facial
shading. The figures are about one inch tall.
The next one is positioned beside him, about to throw a spear. Only minor changed were made to this one.
For the figure in the dragons grasp, I reposed him extensively and
removed his spear. The last figure actually got the most enhancement.
The silly thick bowstring was cut off, and a very thin piece of wire
was shaped instead.
I repositioned his arm to pull the string, and even curled his hand
more to hold it. The arrow is an actual 1/2" tip of a stick pin. All of
this makes the bowman the most modified of the figures.
That's all the details on creation of the piece. Despite my delay and
apprehension about building it, the whole thing turned out to be both
satisfying and fun. I plan to take this piece to Lake Charles, where it
will join another piece to compete in a war game category.
top


